THE RECIPE JOURNAL · Side Dish
Baked Beans You'll Love More Than Ice Cream
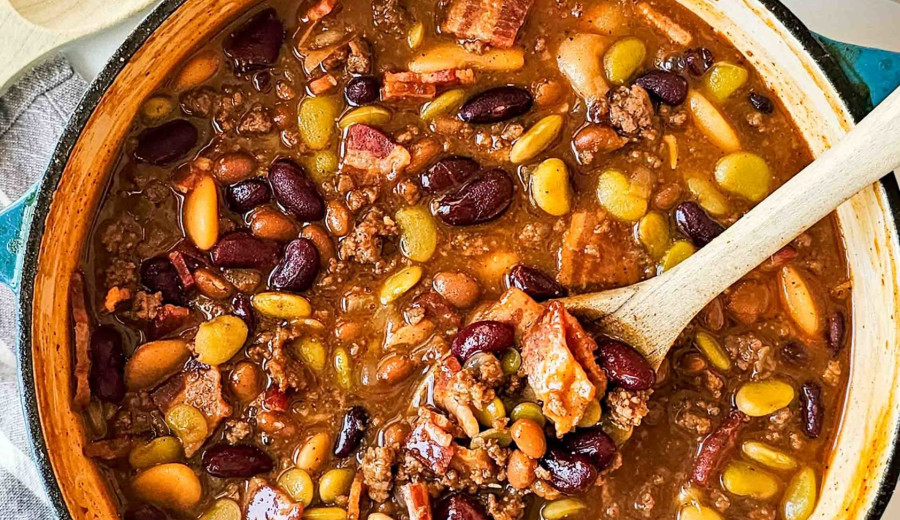
If you think baked beans are just a simple side dish, think again! This recipe transforms them into a sweet and savory treat that might just become your new favorite comfort food.
FROM THE KITCHEN • Baked Beans You'll Love More Than Ice Cream
01 THE RECIPE
Let's make it.
Follow these steps for a delicious result. Tick off each step as you go.
FROM OUR VIDEO COLLECTION
Tasty Chicken and Onion Combo
Something delicious to watch next.
01
Step 1
Start by heating your oven to 350°F (175°C). In a large, deep skillet over medium-high heat, cook the bacon until it’s nicely browned and crispy, which should take about 10 minutes. Once done, transfer the bacon to a paper towel-lined plate to drain off the excess grease.
02
Step 2
Next, grab a big bowl and mix together the cooked bacon, baked beans, kidney beans, pinto beans, chili beans, brown sugar, ketchup, and Worcestershire sauce until everything is well combined. Pour this hearty bean mixture into a large baking dish and sprinkle the Parmesan cheese evenly over the top.
03
Step 3
Pop the dish into the oven and bake until it’s bubbling and the cheese has melted, around 45 minutes. When it’s ready, let it sit for about 20 minutes before digging in—this helps the flavors settle and makes it easier to serve.
Why you’ll love it
These baked beans have a rich, smoky flavor that feels comforting and satisfying. They balance sweetness and tang perfectly, making each bite deliciously memorable. You’ll find yourself reaching for seconds without hesitation.
How to serve
Serve these beans alongside grilled meats, toast, or fresh cornbread. They also work well as a hearty topping for baked potatoes or as a filling for wraps and sandwiches.
Storage & leftovers
Keep leftovers in an airtight container in the fridge for up to four days. Reheat gently on the stove or in the microwave, adding a splash of water if needed to keep them moist. You can also freeze them for up to two months.